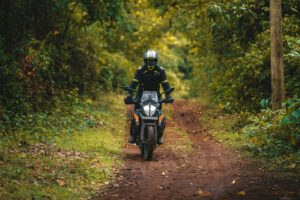
Ask any experienced off-road rider what separates a nervous beginner from a confident trail rider, and the answer might surprise you: it’s often not throttle control or braking — it’s where they put their feet. Foot position and peg technique might seem like a minor detail, but they are the foundation of everything that follows. Get this right, and your balance, control, and endurance on the bike will improve dramatically.
Why Foot Position Matters More Than You Think
Your feet are your connection to the bike. When you stand on the pegs — which you should be doing for the majority of off-road riding — your legs act as natural suspension, absorbing the bumps and shocks that the terrain throws at you. If your feet are in the wrong position, that entire system breaks down. You lose your ability to absorb impacts effectively, your weight distribution shifts at the wrong moments, and fatigue sets in far sooner than it should. Good peg technique is the quiet skill that makes everything else feel easier.
The Ball of the Foot: Your Default Position
The golden rule is simple: ride on the ball of your foot, not the arch. The ball of the foot — the widest part, just behind your toes — should rest on the peg. This position gives you the best combination of grip, feel, and control. Your heel stays low and your ankle acts as a shock absorber. From this position, you can quickly shift your weight, adjust your balance, and use your legs to grip the bike without tensing up unnecessarily.
Many beginners instinctively slide their foot further onto the peg so that the arch rests on it. This feels more secure at first, but it actually reduces your control and makes it harder to use the rear brake smoothly. Practise riding with just the ball of your foot on the peg until it becomes second nature.
Toes Pointing Forward, Heels Down
Once your foot is in the right place on the peg, think about your toes and heels. Point your toes slightly inward (towards the bike) and keep your heels pressed down. This inward angle helps your knees grip the tank naturally, creating a stable triangle of contact between your feet, knees, and body. It also protects your feet from catching on obstacles as you ride through rough terrain.
A dropped heel is also crucial for rear brake control. When your heel is low and your foot is correctly positioned, you can apply the rear brake with precision — pressing gently with the toe of your boot without stamping on it. This nuanced braking technique becomes essential when navigating loose surfaces or technical descents.
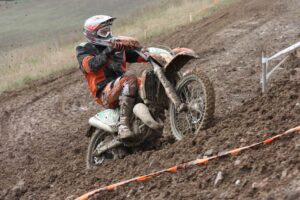
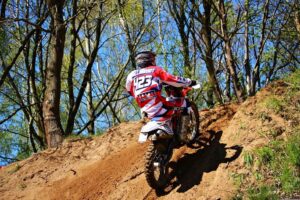
Standing Versus Sitting: When to Change
On technical, bumpy, or loose terrain, you should nearly always be standing on the pegs with your legs slightly bent and your weight centred. Standing allows you to use your entire body as suspension and gives you far greater control than sitting. However, on smoother, faster sections, sitting down with your feet resting on the pegs in the correct ball-of-foot position is perfectly fine and actually helps conserve energy.
The key is to avoid locking your legs straight while standing. Soft, bent knees are your best friend on the trail — they absorb impacts and allow the bike to move underneath you without throwing you off balance.
Common Mistakes and How to Fix Them
The most common peg technique errors we see at training level are: riding on the arch of the foot, pointing toes outward (which risks snagging obstacles and reduces knee grip), locking the knees straight whilst standing, and letting the heels rise when braking. All of these habits can be corrected with focused, deliberate practise in a controlled environment. Start by riding slowly over gentle terrain, consciously placing the ball of your foot on the peg and checking your heel position before speeding up. Slow is smooth, and smooth is fast.
Good foot position is one of those skills that feels awkward at first but quickly becomes instinctive — and once it clicks, you’ll wonder how you ever rode without it. If you’re keen to fast-track your progress and get personalised coaching on technique like this, we’d love to help. View our programmes and discover how structured training can transform your riding in just a few sessions.